Build Your Own VPN in 10 Minutes: Installing and Configuring WireGuard on a VPS
WireGuard is a modern communication protocol that implements encrypted virtual private networks (VPN). Unlike OpenVPN or IPsec, it is designed with a focus on high performance, configuration simplicity, and a minimal attack surface. By utilizing ChaCha20 and Poly1305 cryptographic primitives, it ensures high-speed encryption, while its implementation in kernel-space minimizes latency and overhead from context switching.
In this guide, we will explore two methods for deploying WireGuard on GDKHOST infrastructure. Our servers utilize genuine KVM virtualization. This is critical for WireGuard: the protocol operates as a Linux kernel module, and only KVM provides full access to the kernel stack and resources, unlike container-based isolation (OpenVZ/LXC) where network stack performance is often constrained.

Method 1: Fast Start with a Pre-configured Image
To automate the deployment process, a pre-configured OS image with a built-in WireGuard environment is available in our control panel.
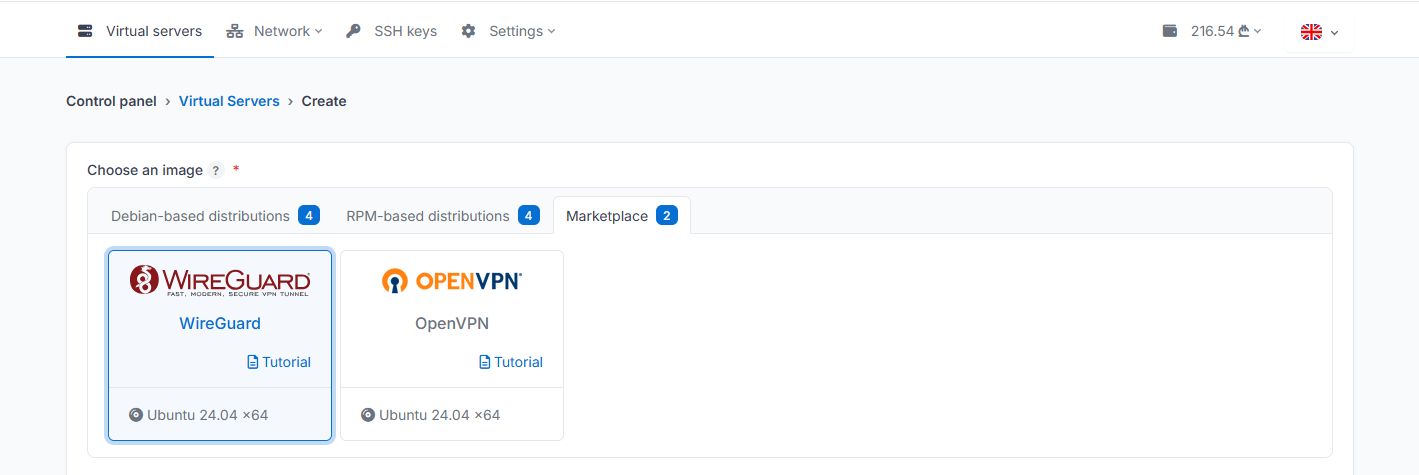
When ordering a server and choosing an OS image, navigate to the "Marketplace" tab and select the image named WireGuard for deployment. Currently, this template is available based on Ubuntu 24.04 LTS.
Once the installation is complete, wait for 3–5 minutes. Immediately after deployment, the system performs automatic package base updates and repository indexing. Attempting to run scripts before these processes finish may result in
aptordpkglock conflicts.
Connect to the server via SSH and launch the setup wizard:
wireguard-setupScript Specifics:
Global IPv4: The script will automatically detect the server's public address. This should be left as is, as it is bound to your KVM instance's network interface.
Port and Local Network: By default, the wizard generates a random UDP port and local subnet range. Unless you have specific network architecture requirements, we recommend keeping the suggested values. This reduces the likelihood of the service being detected by mass scans of standard ports.
Client Management: The same script is used to add or remove peers. Upon completion, you will receive a configuration file and a QR code for quick import into mobile applications.
Method 2: Manual Configuration on Ubuntu 24.04 LTS
If you require full control over the configuration and wish to understand the underlying network stack, follow the manual installation steps.
1. System Preparation
Update the package base and install the WireGuard module:
apt update && apt upgrade -y
apt install wireguard -y
2. Key Generation
WireGuard uses the Noise protocol for key exchange. Generate the server's key pair:
umask 077
wg genkey | tee /etc/wireguard/private.key | wg pubkey > /etc/wireguard/public.key
3. Interface Configuration
Create the /etc/wireguard/wg0.conf file. You can find the name of your external interface (e.g., eth0 or ens3) using the ip addr command.
[Interface]
PrivateKey = <contents of /etc/wireguard/private.key>
Address = 10.8.0.1/24
ListenPort = 51820

# NAT and Packet Forwarding Setup
PostUp = iptables -A FORWARD -i wg0 -j ACCEPT; iptables -t nat -A POSTROUTING -o eth0 -j MASQUERADE
PostDown = iptables -D FORWARD -i wg0 -j ACCEPT; iptables -t nat -D POSTROUTING -o eth0 -j MASQUERADE
4. Enable IP Forwarding
To allow packet translation between interfaces, you must permit IPv4 routing at the kernel level. Modify /etc/sysctl.conf:
net.ipv4.ip_forward=1Apply the parameters: sysctl -p
5. Firewall and Autostart
Open the selected UDP port and activate the service:
ufw allow 51820/udp
systemctl enable wg-quick@wg0
systemctl start wg-quick@wg0
Connecting Clients
Use official clients for desktop (Windows, macOS, Linux) and mobile (iOS, Android) platforms. A typical client config (client.conf):
[Interface]
PrivateKey = <client_private_key>
Address = 10.8.0.2/32
DNS = 1.1.1.1

[Peer]
PublicKey = <server_public_key>
Endpoint = <server_IP_address>:51820
AllowedIPs = 0.0.0.0/0
PersistentKeepalive = 20
The AllowedIPs = 0.0.0.0/0 parameter routes all client traffic through the encrypted tunnel. PersistentKeepalive ensures connection stability during network changes (network roaming) or when behind a strict NAT.
FAQ
Which port does WireGuard use by default?
The standard port is 51820/UDP. However, for security purposes during automated installation on GDKHOST, the port is selected randomly.
Can I install WireGuard on a router?
Yes, the protocol is natively supported in modern firmware such as Keenetic, MikroTik (RouterOS 7+), and OpenWrt.
Why doesn't the setup script run immediately after server creation?
After the initial boot of a server, the cloud infrastructure initiates critical security package updates. You must wait for apt or dpkg processes to complete, which typically takes 2–5 minutes.
Manual configuration provides a deep understanding of routing and security mechanisms, while using a prepared image minimizes the risk of iptables configuration errors and reduces deployment time. The GDKHOST technological foundation allows WireGuard to operate with maximum bandwidth utilization due to the lack of virtualization overhead.
Deploy your VPN server and secure your data today.
WireGuard is a registered trademark of Jason A. Donenfeld.